The "Pit" saga beings ...
We started "kicking" around various greenhouse options in the spring of 2013. We purchased a small
plastic type greenhouse.

It worked fine for a month or so for sprouting, if the wind didn't blow too hard, but once we started to have sun, even with the sides rolled up, it got too hot ... and then the zippers broke and the PVC that held the frame together cracked ...
Then we saw these "cute" polycarbonate greenhouses online ... yep, we bought one! Talked about maybe digging it in a foot or so to add strength to the structure and we also thought it might increase the growing season by using the core earth temperature. We took all the pieces out of the box, found the "instructions" which kind of showed graphics of how to put the pieces together.

Looked online for more help and read some forum posts that mentioned how purchasers ended up "MacGyvering" it together. My husband is VERY handy, but before we ended up in divorce court, it was put back in the box and now has a home in the basement :-) ... btw ... it is for sale at a terrific price!
We researched the soap bubble greenhouse ... spoke with the "inventor" ... googled around and found that while the bubbles were fun to play with, there really wasn't a long term working model.
I finally stumbled upon the walipini / pit greenhouse concept. There wasn't a ton if information on them other than an affiliate book that many marketers "pimp" out, but what I could find sounded good. We decided for our climate ... just south of Vienna in Austria, that it would be a perfect "fit" for us. The water table is several meters down, our soil is gravel filled and our backyard, as they like to say "has an unobstructed view of the southern sky"!
The only problem was that the yard was flat ... so we decided to attach the greenhouse to the existing house with an entrance from the basement as well as the "ground" level. We figured we would also get the added bonus of keeping the back of the house toasty during the cold winter months.
We dug down 2 meters ...
We dug down 2 meters ...

Let the ADVENTURE begin!
Backhoe delivered and moving dirt has begun ... September 14, 2013
A little shoveling to uncover the top layer ...
OK, we are getting the hang of how to work the backhoe ... woooHOOO!
Cute little earth mover ... this guy saved us soooo much work. We built a mountain in the back of the property for another project ...
During the dig, AL uncovered a humongous drain box ... that we decided to keep ... Our course he had to excavate it with surgical precision.
The guys dug in with the shovels to get in the tight spots
We uncovered more stuff ... the electric and water pipes that run from the house to the well in the back ...
A view from the top of the drain box ... this services a couple of floor drains in the cellar ... it is about 12 feet deep

The guys broke out the Big Boy tools for breaking up some of the existing cement and flagstones
The decision was made to use concrete blocks to keep costs down. We flew them in from the neighbors yard over the fence.
In all we got 5 pallets of 20cm block
We shopped the metal recycle yard for re-bar ... great prices
September 21
Saved a lot of money by getting the backhoe for the weekend once again. Delivered on Friday afternoon and pickup on Monday morning ... pay for 1 day
Safety always comes first and even though our gravel walls were strong we still took the time out to shore them up

Out the laser level to make sure we were on target
Why push the heavy mixer around the yard when you can just fly it around like Tinkerbell?
A long day and then we secured the site for the night. We didn't want any people or animals to get a nasty surprise in the dark :-)
September 23
Getting ready to get serious about shaping up some footers
Forming up the first of the footers ... we are 1 week into the project
A lot of money was saved by cutting up old wood for framing the footers
Drilled into the wall to secure re-bar when the footer is poured
September 25
The first footer is being poured... or I should say we hauled it bucket by bucket down the steps. This was WAY TOO LABOR INTENSIVE!
To save money we purchased a pallet of cement and rented a truck to bring it home ourselves. We unloaded 60 bags in all!
OK, we have everything we really need to get serious with the concrete ... let's get busy!
The bucket brigade was going to kill us all so AL put together a concrete chute that proved invaluable
Recycling an old pond liner, we ran it down the chute and it made for a slick surface for the concrete to slide down ... nifty!

Many days it was just the 2 of us ... AL ran the mixer then went in the pit while I fed him the concrete down the chute
Slowly the footers came together ... completed October 4th
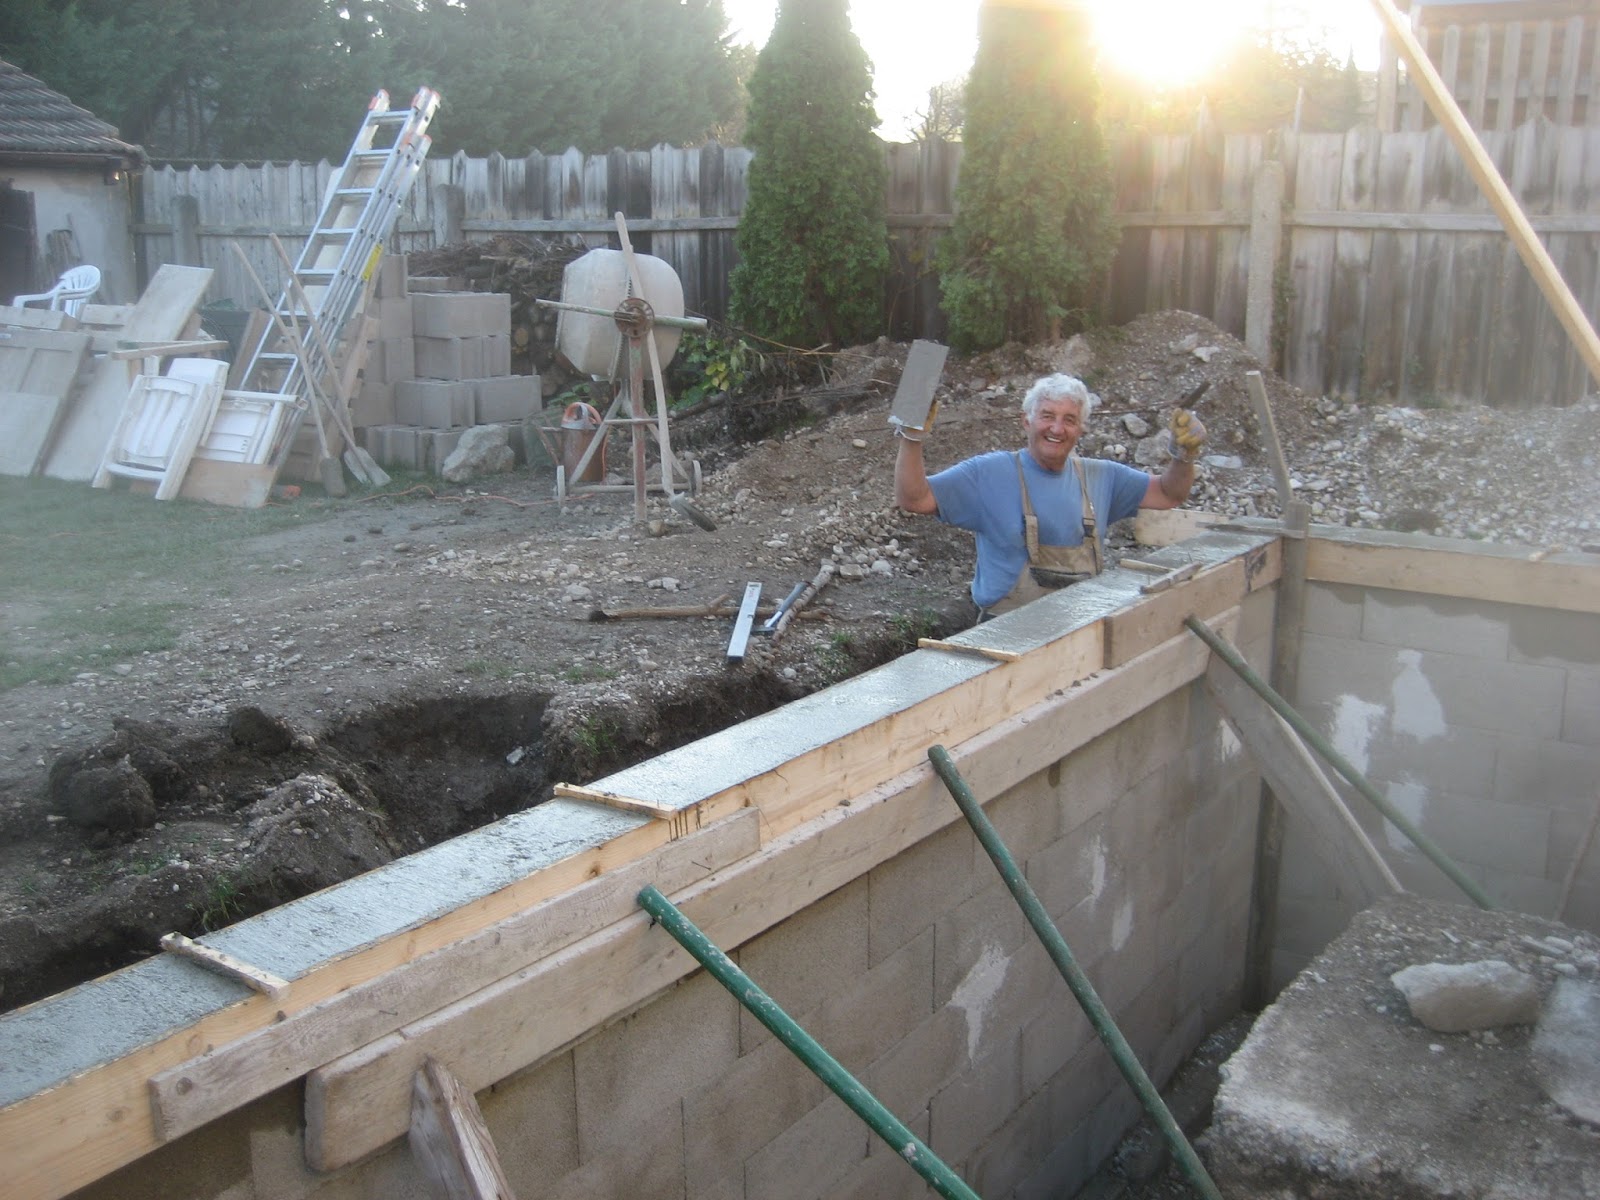
The walls begin to go up the end of the first week of October
The laser level helped to get everything spot on
WHEW! The concrete chute was a big help, but it was still done scoop by scoop. I figured I was going to look like Popeye by the end of this project ... lol!
Job completed for the day ... well done!

We were now at the point where we needed to get the insulation (10CM / 4 inches) and the vapor barrier paint.
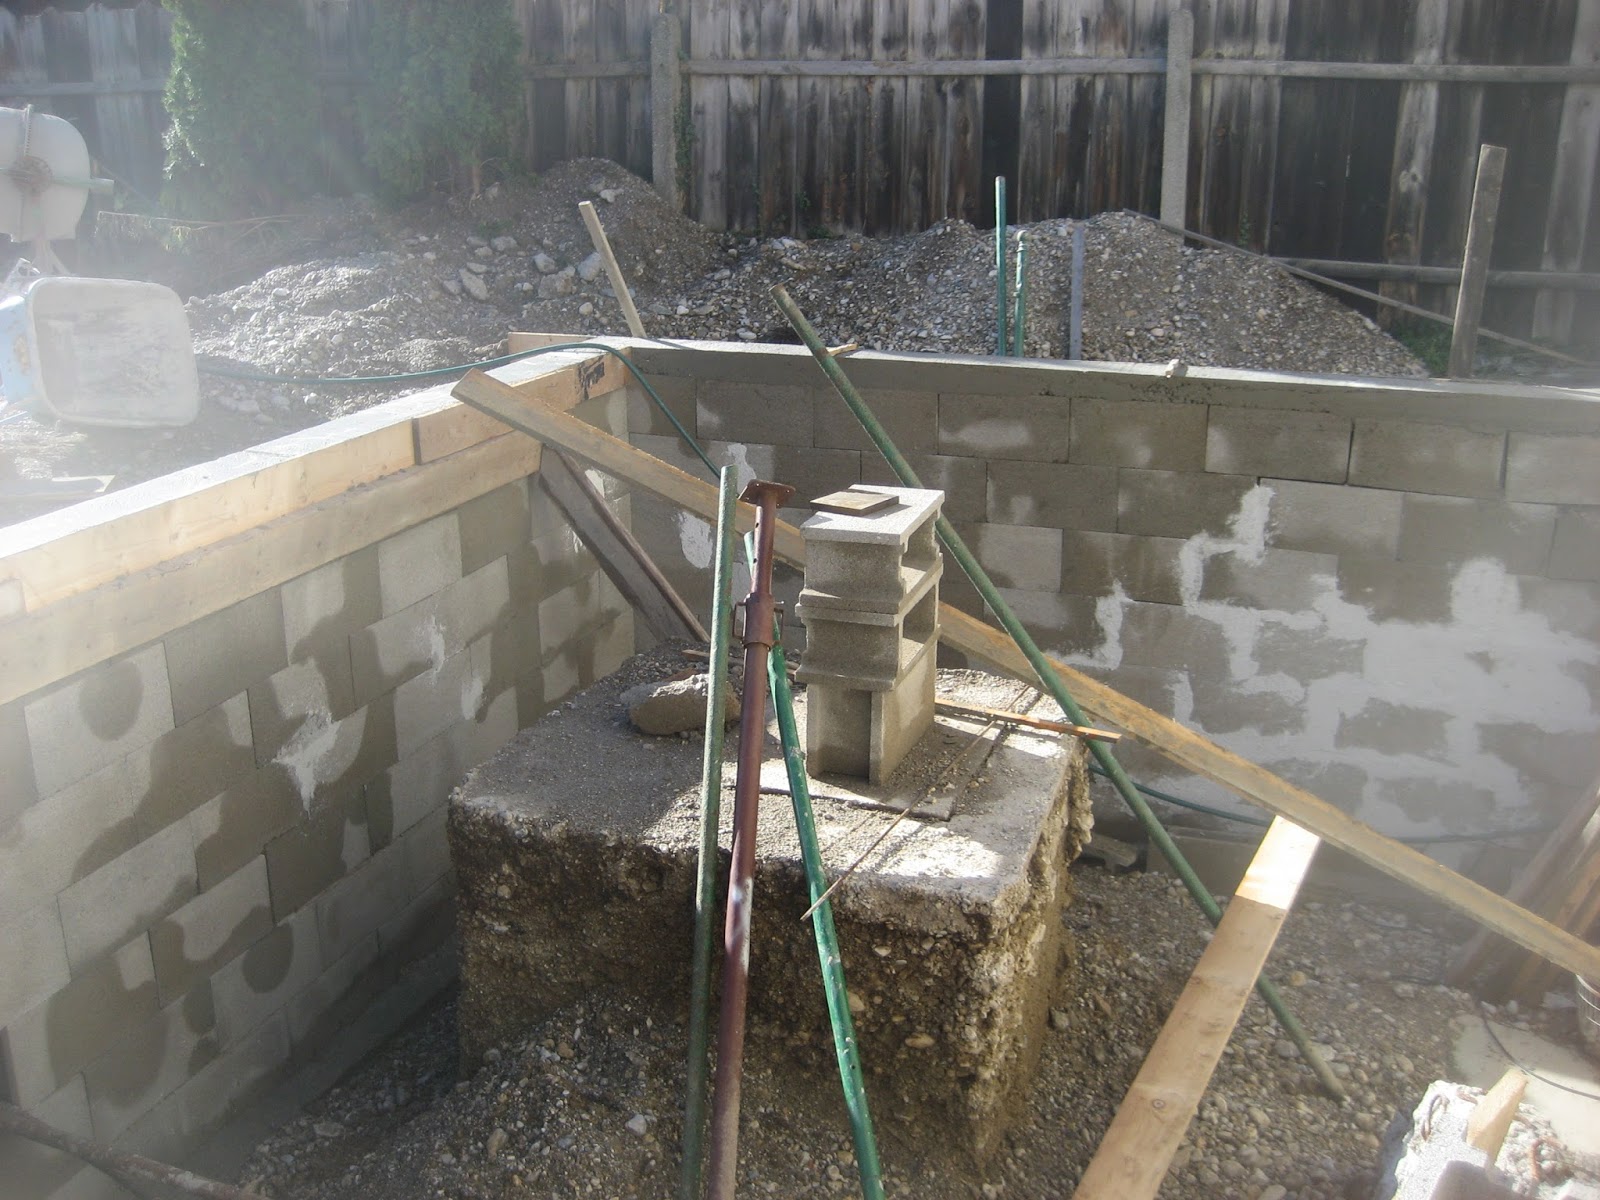
The walls took a lot of time ... everything needed to be straight for the whole project to turn out right ... concrete was poured in all the blocks and re-bar added for strength ...
The first corner completed ... October 10th
Moving right along on the back wall ... check, adjust, level
Progress is being made .... YEAH!
Shopping Day October 11th
150 meters of drain pipe ... this is for the cooling / heating it will be buried ...

Unloading & working with this was like wrestling a box of snakes! It will be the passive geothermal heating & cooling system. For our purpose it will probably be more efficient during the summer to help with cooling the greenhouse. This is close to 500 feet ... Scheesch!
We ran it around the outside then flipped it and went back the way we came ... left a portion on the inside of the greenhouse for connections.
Down in the pit to fill in the cracks between the blocks ... everything has to be sealed up before we begin the next step of waterproofing.
This is nasty dirty stuff, but it is the vapor barrier paint of choice ... just paint it on, wait a couple of days and you are good to go!

Back wall is painted and things are moving right along
Here is our mock up drawing of what the finished product will look like

The vapor barrier is dry and it is time to begin gluing the insulation on. I must say that is a pretty pink!

OK, the 2 part adhesive is VERY sticky ... I guess that is a good thing
The insulation is going on piece by piece ... slather, gentle hand-off down to the pit and tap into place with a rubber mallet
Hmmmm .... next is the dimpled membrane ... it protects the pink insulation from sticks and rocks that might damage it and is also an addition vapor barrier.
We duct taped the nubby black stuff to the pink insulation until we could back fill ...

October 20th
WoooHOOO! The back-fill begins on portions of the pit ...
Moving the back-fill around so it will be easier to pour the header is a time consuming job ... shoveling the gravel filled soil is hard work :-(
November 6th
The walls are up and the time is ready to begin forming the header ...

Forming out the header
We paid special attention to the area where the pit attached to the existing house
Now we are getting to the critical part where the header needs to be accurate for the carpenters to attach the glass roof. Out comes the laser level again.
It is November 8th ...
OK, a lot of time went into getting the header ready, but it will all be worth it
We mixed and filled up the wheelbarrow so we could control the pour ... time consuming, but worked out great.
A work in progress ... this is the time for perfection
Header complete ... YIPPPEEEE!!!!! We had originally planned to have the pit greenhouse enclosed by the end of October ... well ... you know how that goes ... :-( November 8th and we are ready for the carpenters to do the framing portion once the concrete sets
November 11th
November 23rd
The wood beams (leimbinder) have been purchased, cut and we are staining it a birch color.
We saved a ton of bucks by painting the wood ourselves ... it surprised us by how many man hours it took to complete ...

Finally we have all the glass onsite. We found a super deal on triple pane glass on Wilhaben.at ... a site similar to craigslist. We brought the smaller ones home in the car and they will be used for the lower windows.

The larger double panes that will be used for the actual roof was another deal that we worked out ... and they delivered!
Never be afraid to ask what you can do for someone else. Trade, barter, whatever!
Holy Cow ... this door new retails for over 1000€ we found it used on Wilhaben.at for only 150€ and the guy delivered ... how cool is that?

November 26th
The carpenters show up bright and early ... 7 am. Peter did an awesome job for an awesome price ... hey ... who knew he needed a webpage?
When doing a project of this size, know when to leave it to the professionals. This team of 3 men were up and down ladders and made it look easy ... team work at its finest!

By doing the cutting and painting offsite, things went up pretty fast
Finally the roof angle is taking shape and framing for the roof is almost complete ... all in one day!
December 1
The glass guys arrived to put up the roof panes ... there was no way that we could do these large panes by ourselves.
The glass guys rocked! In only a couple of hours they had all the panes up. Unfortunately ... we were minus one window pane ...

Right after the large glass panes were delivered we had a big windstorm. We mentioned to the delivery guys that they might want to consider wind when they set the glass where they did ... they laughed and said NO Problem ... the glass is VERY heavy. Well, you can see, it wasn't heavy enough ... they re-ordered .. NO CHARGE!

OK, the replacement glass didn't arrive on time for the original installation. The glass guys needed to make a separate trip. But the good news is that they flew it in over the fence and when we had the next windstorm it was held in place by the stand.
December 5th
The carpenters wanted to wait until the glass was installed before they completed their portion where it butts up to the existing house.
We actually had to buy 2 swing windows "retail" for the roof ventilation, but we shopped around and got a good deal
In a couple of hours the carpenters had the 2 swing windows installed


... and then the snow came. This was something we were hoping would NOT happen. We really wanted to have the roof completed, but Mother Nature had other ideas. It wasn't too bad. From a distance it looks like an old "snaggletooth" roof :-)
The snow left as quickly as it came and the glass guys made a special trip out here to complete the roof
December 7th
We searched around for the best prices on polycarbonate and found it close to Vienna. We took a borrowed van and strapped it on top. Once again we faced high winds ... so much so that the guys stopped on the autobahn to re-strap. By the time they arrived here all the protective film had been stripped off. Another adventure!

We decided after much discussion that the polycarbonate would be the best choice for the walls. It can be cut with a strong knife and screwed right into place. We got (2) 2M x 3M pieces ... after all was said and done we only had a tiny piece left. AL did a terrific job calculating!
December 12th
To make this job look really slick, we decided to use some reclaimed roof tiles (from when the solar was installed on the roof of the house) to make the greenhouse flow seamlessly.
Finally the last roof tile was put into place ... !

The roof portion is completed except for the flashing ... it looks awesome!
December 25th ... Christmas Day!
Next on our to do list is the bottom triple pane windows. AL and I can do these ourselves. They are not so heavy ... about 60 pounds and we can access them from the ground rather than climbing ladders with glass which scares the #!@T out of me

We framed the lower windows out with wood and used some expanding foam strips and special glass silicone to make sure the seal was tight
These windows went in pretty fast once we got the hang of it. The only problem was the weather co-operating
2 more done .... it is looking great!
Here you can see the layers of block, vapor barrier, insulation, nubby paper, flashing ... along with wood for framing the window and the expandable foam strip


We still needed to back-fill the west side of the greenhouse. So AL rigged up some scaffolding to place the final 3 windows
December 28th
West wall poly goes up pretty quick ... quick, that is, once all the measurements and dry fitting was complete .... lol! We found that using a vacuum cleaner worked pretty good to clean out the channels once we were ready to install ...

December 29th
The east side poly is finally up ... it seems the dry fitting is the key .... all these crazy angles make for a crazy day!
We used a clean IBC tote as a rainwater catch tank for 10€ versus buying a special rainwater tank for €399 ...

We have back-filled the eastside and directed the downspout into the IBC tote ... will back fill more later
January 1, 2014
It was -5C outside, but a toasty +10 inside the pit! A New Year begins and there is still "tweaking left to do ...


January 12, 2014

Whew! January 17, 2014 and the outside is pretty much complete.
We have trimmed out most of it and while the east side needs a bit more back-fill we are pretty much done until spring. We are going to plant a rock garden to cover the space between the ground level and where the first window begins. Once again, I think most of this will be done in spring when we can do the planting. Right now we are hovering around -5C and there is a bit of snow on the ground
Everyone did an incredible job .. the GesundheitsVerein rocks!
Our Completed Pit Greenhouse / Walipini

January 25th
Seedlings were planted !

March 1st
Our little seedlings are happy campers and will be a big hit at the local plant exchanges come April!

No comments:
Post a Comment